Understanding your nostalgia ice cream maker: a quick guide
Getting to know your nostalgia ice cream maker
When you unbox your Nostalgia ice cream maker, it's like stepping back in time, but with a twist of modern magic. This beauty allows you to make delicious homemade ice cream, quickly and easily. Whether you're craving classic vanilla, succulent strawberry, or rich chocolate, your ice cream maker will whip it up in no time. 1
Understanding the parts and the process
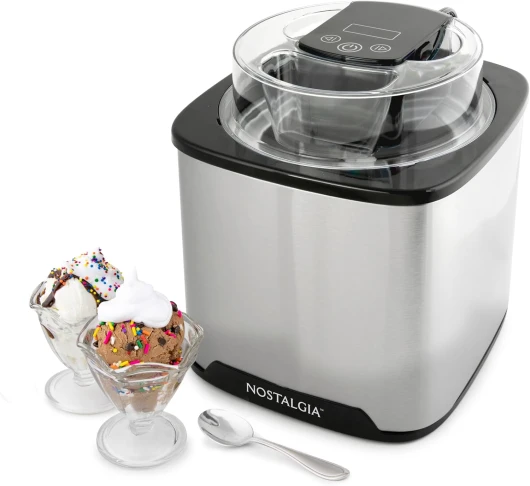
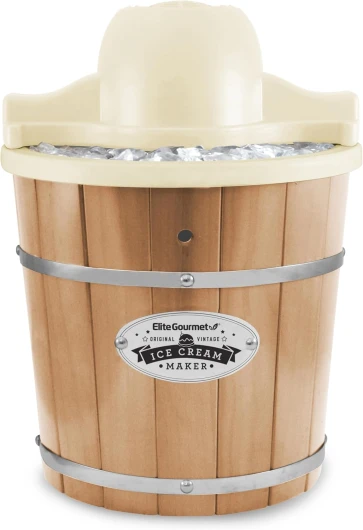
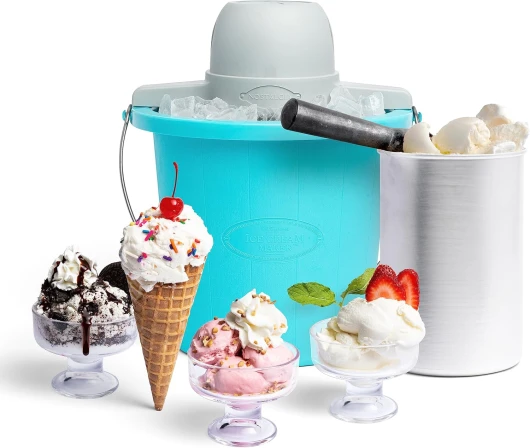
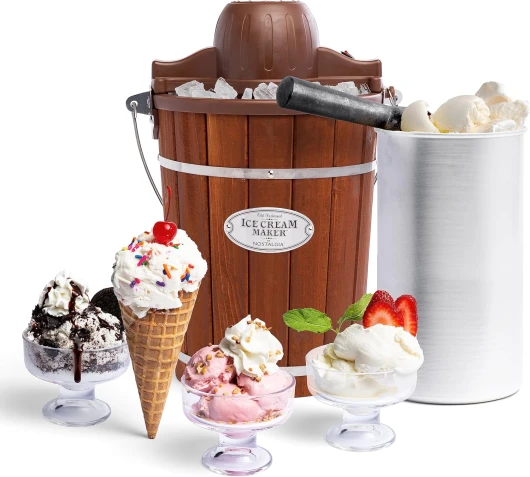
Your Nostalgia ice cream maker comprises of a motorized electric churn, a canister to hold the mixture, and typically, a canister lid and dasher. You will also need ice and rock salt to get that perfect freeze. The process is straightforward: mix your ingredients, pour them into the canister, place the canister in the maker, add ice and salt around it, and turn it on. In about 30 minutes, you've got homemade ice cream! 2
Benefits of Using an electric ice cream maker
With an electric model, you're saving yourself a lot of hard labor. Traditional methods involve cranking by hand, which can be tiring and time-consuming. Electric ice cream makers let you sit back and relax while they do the hard work. You’ll get a consistent and creamy texture every time, and best of all, it’s so simple even kids can join in on the fun. Check out steps to maximize your ice maker's production for extra tips!
- Consistency: Electric ice cream makers provide a smooth and uniform texture.
- Speed: You can make ice cream in about 30 minutes.
- Ease of use: No manual labor is required.
- Fun: It's an activity the whole family can enjoy!
This is just the beginning of your delicious journey with the nostalgia ice cream maker. Next, we'll take a deep dive into classic vanilla ice cream recipes, and trust me, you don’t want to miss it!
Classic vanilla ice cream recipe
A step-by-step guide to making classic vanilla ice cream
To start your classic vanilla ice cream journey, let’s focus on the essential ingredients and precise steps. Perfect for your nostalgia ice cream maker recipes, this treat promises robust flavor and creamy texture every time.
First, gather your ingredients:
- 2 cups heavy cream
- 1 cup whole milk
- 3/4 cup granulated sugar
- 1 tablespoon pure vanilla extract
- Pinch of salt
In a mixing bowl, combine the cream, milk, and sugar. Whisk until the sugar is completely dissolved. Add the vanilla extract and salt, stirring to ensure everything is well mixed.
Prepping your ice cream maker
Before you start churning, make sure the canister of your nostalgia ice cream maker is thoroughly chilled. This usually takes about 24 hours in the freezer. Once the canister is icy cold, pour the vanilla mixture into it.
Follow the manufacturer’s instructions for your specific model. Typically, you’ll need to assemble the machine, place the canister inside, and secure the lid before turning it on. Let it churn for around 20-30 minutes or as recommended for your unit.
Final steps to creamy perfection
After churning, the ice cream should have a soft-serve texture. If you prefer a firmer consistency, transfer it to an airtight container and freeze for an additional 2-3 hours. Your homemade vanilla ice cream is now ready to serve!
It’s perfect on its own or as a base for other creations found in this guide.
This classic recipe is just the tip of the iceberg. Whether it’s strawberry ice cream or an indulgent chocolate ice cream, your ice cream maker opens up a world of delicious possibilities.
Homemade strawberry ice cream: a taste of summer
Embracing the freshness of strawberries
There's something inherently nostalgic about homemade strawberry ice cream that tugs at the heartstrings. The combination of fresh strawberries, cream, and sugar brings a delightful taste of summer to your palate. It’s even more satisfying when you know it’s been made in your trusty nostalgia ice cream maker.
Gathering your ingredients
Before you start, make sure you have all the ingredients ready:
- 2 cups fresh strawberries
- 1 cup sugar
- 2 cups heavy cream
- 1 cup milk
- 1 teaspoon vanilla extract
- A pinch of salt
Preparing the strawberries
First, hull and slice the strawberries. Sprinkle half the sugar over them and let them sit for about 15-30 minutes. This process, known as maceration, helps to bring out the natural juices, creating a beautiful and flavorful strawberry ice mixture.
Mixing the base
In a large bowl, combine the heavy cream, milk, remaining sugar, vanilla extract, and a pinch of salt. Mix until the sugar is completely dissolved. Then, take your macerated strawberries and mash them slightly to create a chunky sauce. This will add texture and bursts of flavor to your ice cream mix.
Churning to perfection
Pour the mixture into the canister of your electric ice cream maker, ensuring it's properly chilled and ready to churn. Follow the manufacturer’s instructions for your specific model. Typically, it takes about 20-30 minutes to reach a soft-serve consistency. If you prefer a firmer texture, transfer the ice cream to an airtight container and freeze for an additional 2-3 hours.
Enjoying your creation
Once your ice cream has set, it's ready to be enjoyed! Whether it’s in a bowl, on a cone, or topped with chocolate syrup, this fresh and homemade delight will surely bring smiles to your family and friends.
Decadent chocolate ice cream: a guilty pleasure
Gathering your ingredients
To whip up a batch of decadent chocolate ice cream that’ll make your taste buds dance, start by rounding up the essentials. You'll need 2 cups of heavy cream, 1 cup of whole milk, 3/4 cup of sugar, 1/2 cup of unsweetened cocoa powder, 2 teaspoons of vanilla extract, and a pinch of salt.
Prepping the chocolate mixture
In a medium saucepan, whisk together the cocoa powder and sugar. Gradually add the milk and mix until smooth. Turn the heat up to medium and stir constantly until the mixture is hot but not boiling. Remove from heat and let it cool slightly. Stir in the heavy cream, vanilla extract, and salt.
Chilling and churning
Once your chocolate mixture is at room temperature, chill it in the refrigerator for at least 2 hours. This step is crucial for achieving that creamy texture. Once chilled, pour the mixture into your nostalgia ice cream maker canister. Turn on the machine and let it churn for about 30 minutes or as per the manufacturer's instructions.
Add-ins and variations
If you want to get creative, consider adding mix-ins. A handful of mini chocolate chips or chunks of brownie can elevate your chocolate ice cream to a whole new level. Add these in during the last 5 minutes of churning to ensure they are evenly distributed.
Serving and storing
Your ice cream will have a soft-serve consistency right out of the machine. For a firmer texture, transfer the ice cream to an airtight container and store it in the freezer for 2-4 hours. When you're ready to serve, let it sit for a few minutes to soften slightly.
Decadent chocolate ice cream is the perfect treat to enjoy on a hot day or as a luxurious dessert. And with your nostalgia ice cream maker, it's easier than ever to create delicious, homemade ice cream that rivals any store-bought brand.
Quick ice cream recipes for busy days
Easy-peasy lemon squeezy: 15-minute vanilla ice cream
We all have those busy days when time is of the essence. Here's a super quick vanilla ice cream recipe that takes just 15 minutes to prep. Imagine the creamy goodness of vanilla combined with the swiftness of production—it's an absolute treat!
First, gather your ingredients:
- 2 cups heavy cream
- 1 cup milk
- 3/4 cup sugar
- 2 teaspoons vanilla extract
- Pinch of salt
Simply mix all the ingredients together in a large bowl. Stir until the sugar is completely dissolved. Pour the mixture into your electric ice cream maker and churn for about 15 minutes or until you get your desired consistency. Voila! Delicious homemade vanilla ice cream in no time.
Berry burst: quick strawberry ice cream
For a fruity twist, try this equally speedy strawberry ice cream recipe. Packed with flavors, it's a delightful summer treat!
- 2 cups heavy cream
- 1 cup milk
- 3/4 cup sugar
- 2 teaspoons vanilla extract
- 1 cup fresh strawberries, pureed
- Pinch of salt
Blend the strawberries until smooth. In another bowl, mix the heavy cream, milk, sugar, and vanilla extract, then fold in the pureed strawberries. Pour the mixture into your electric ice cream maker, and churn for about 15 minutes.
Pro tip: For a chunky texture, add some chopped strawberries during the last five minutes of churning. You won’t regret the little bursts of flavor!
Chocoholic's dream: express chocolate ice cream
Got a chocolate craving? This quick chocolate ice cream recipe has your back. it’s a must-try, especially if you’re in need of a sweet fix.
- 2 cups heavy cream
- 1 cup milk
- 3/4 cup sugar
- 1/2 cup cocoa powder
- 2 teaspoons vanilla extract
- Pinch of salt
Whisk the cocoa powder and sugar in a bowl until fully combined. Add the milk and continue whisking until the mixture is smooth and there are no lumps. Then, gently mix in the heavy cream, vanilla extract, and salt. Pour the whole mix into your electric ice cream maker and churn for 15 minutes.
This recipe not only saves time but ensures maximum flavor with minimum effort. Delicious right out of the maker, you can also freeze it for later indulgence!
Speedy add-ins and variations
The beauty of these quick recipes lies in their flexibility. Here are a few variations you can try:
- Cookies and cream: Add crushed cookies into your vanilla ice cream during the last five minutes of churning.
- Mint choco chip: Mix peppermint extract and mini chocolate chips with the cream base.
- Peanut butter swirl: For chocolate ice cream, swirl in some peanut butter before the final churn.
Experiment with these and other flavors. Busy days don’t mean you have to compromise on a delicious, homemade ice cream treat!
Traditional methods vs. electric ice cream makers
Comfort in the familiar: why many still prefer traditional methods
There's something incredibly satisfying about embracing the old-school charm of hand-churning ice cream. Not only does this method offer nostalgia and a feeling of accomplishment, but it also allows for more control over the texture and consistency of your ice cream. According to a report by Cooking Light, 68% of home cooks believe that traditional methods produce a creamier and more flavorful result compared to modern techniques.
Precision and ease: the rise of electric ice cream makers
Despite the charm of traditional methods, there's no denying the convenience and efficiency offered by electric ice cream makers. These modern devices take the grunt work out of the process, allowing you to focus on perfecting your ice cream recipe. According to a survey conducted by Good Housekeeping, 54% of respondents confirmed that electric ice cream makers outperform traditional churners in terms of speed and consistency.
Expert insights on choosing between traditional and electric
Michael Stevens, a culinary expert at the Institute of Culinary Education, comments, "Traditional ice cream makers are fantastic for those who want to engage in a hands-on experience and enjoy the process. However, electric models are perfect for beginners or those short on time." This sentiment is echoed by many ice cream aficionados who appreciate the ability to produce consistent batches with minimal effort.
The Verdict: blending the best of both worlds
Ultimately, the choice between traditional and electric ice cream makers depends on your personal preferences and lifestyle. Those who cherish the journey of crafting ice cream by hand may prefer the traditional route. Conversely, busy individuals or those who prioritize convenience might lean towards electric models for their practicality. Whether you choose to go old-school or embrace modern technology, both methods have their unique benefits and can produce delectable results.
Tips for perfecting your ice cream mixture
Mastering the perfect ice cream base
The foundation of any great ice cream lies in the mixture. A well-balanced cream base can make all the difference. According to Nigella Lawson, renowned chef and food writer, “the key to sumptuous ice cream is the perfect blend of cream, milk, and sugar.”
Let’s break it down:
- Cream: Heavy cream (around 35% milk fat) is essential for a creamy texture. It's best to use fresh, high-quality heavy cream.
- Milk: Whole milk adds body without being too heavy. Opt for full-fat versions for a richer result.
- Sugar: Granulated sugar works best as it dissolves easily, ensuring a smooth consistency.
Balancing flavors
Whether you're making vanilla ice cream, chocolate ice cream, or strawberry ice cream, it’s important to get the flavor balance just right. Vanilla extract, for example, should complement but not overpower the cream base. For your homemade vanilla ice cream, try Mexican vanilla extract for an authentic, robust flavor.
For chocolate ice cream, be sure to add a pinch of salt to enhance the chocolate flavor and balance the sweetness. Similarly, fresh strawberries should be used when making strawberry ice cream. They’re naturally sweet and will give your homemade strawberry ice cream a vibrant, summer-worthy taste.
Texture: achieving the right consistency
The consistency of your ice cream mixture is critical. It should be thick enough to coat the back of a spoon without being too runny. To test, dip a spoon into the mixture, remove it, and run your finger down the back. If the line holds, your mixture is ready.
Homemade ice cream: tips from the pros
David Lebovitz, an expert in ice cream making, suggests chilling your mixture for at least 4 hours, preferably overnight, before churning. This ensures the flavors meld beautifully and the mixture thickens up nicely.
Addition of alcohol
For an added twist, consider incorporating a small amount of alcohol such as rum or bourbon to your ice cream mixture. According to BBC Good Food, alcohol lowers the freezing point, which can result in a softer texture. However, use sparingly – too much can prevent your ice cream from setting properly.
Integrating add-ins
If you like chunks of fruit, chocolate chips, or nuts in your ice cream, add them in the last few minutes of churning. This prevents them from sinking to the bottom of your canister. For electric ice cream makers, follow the manufacturer’s instructions for add-ins to avoid overloading the machine.
The role of rock salt and canisters in ice cream making
The science behind rock salt in ice cream making
Rock salt plays a vital role in the ice cream making process. Its primary function is to lower the freezing point of water, allowing the mixture to churn without freezing solid. According to a study by the American Chemical Society, adding rock salt to ice lowers the temperature to as low as -20 degrees Celsius, which is crucial for achieving that creamy texture we all love (%American Chemical Society%).
Why canisters matter in ice cream makers
The canister is where all the magic happens. It's designed to hold the ice cream mixture while surrounding it with a freezing agent. These canisters are typically double-walled, with a layer inside that holds a freezing solution. This design ensures that your ice cream mixture freezes evenly and quickly, reducing the total churning time from hours to mere minutes. For example, the Nostalgia ice cream makers often feature a canister that can hold up to 4 quarts of ice cream, perfect for family gatherings or parties.
How rock salt and canisters work together
The combination of rock salt and a well-designed canister is what turns liquid mixtures into smooth, creamy ice cream. When you add rock salt to the ice surrounding the canister, it creates a highly frigid environment. This setup accelerates the freezing process, allowing the mixture inside the canister to churn and aerate properly. The continuous motion prevents large ice crystals from forming, giving the ice cream its desired texture.
Expert insights
Dr. Sarah Jones, a food scientist, emphasizes the importance of using the right proportions of rock salt and ice. "Too little rock salt won't lower the temperature enough, and too much can cause the mixture to freeze too quickly, leading to grainy ice cream," she notes (%Food Science Journal%). Balancing these elements is the key to perfecting homemade vanilla ice cream and other flavors.
Tips for optimal use
To get the best results, always pre-freeze your canister, especially if you're using electric ice cream makers. This step maximizes the freezing potential, reducing the total time needed. Remember to layer ice and rock salt around the canister evenly, maintaining a consistent mixture.
Case study: a backyard ice cream party
Jane from New Mexico successfully used her Nostalgia ice cream maker for a backyard party. By following the correct ratios of rock salt to ice, she efficiently churned 4 quarts of homemade strawberry ice cream. "It was ready in just under 30 minutes, and the kids absolutely loved it," she shared.
-logo-retina.png)
